There are a number of actions you may need to do for people. This section focuses on modifying a users’ settings.
User availability
The availability of a person determines whether IM-Notify will send this user a call or message. Only active people will receive calls and messages. Note: if a person is not active they are still able to send messages (if they have the correct permissions). This feature is an easy way to stop messages and calls being received if the person, for example; is on holidays.
When the tick next to their name is green, they have been marked as available and will receive messages and calls. When the tick next to their name is grey, they have been marked as unavailable, and will not receive calls or messages.
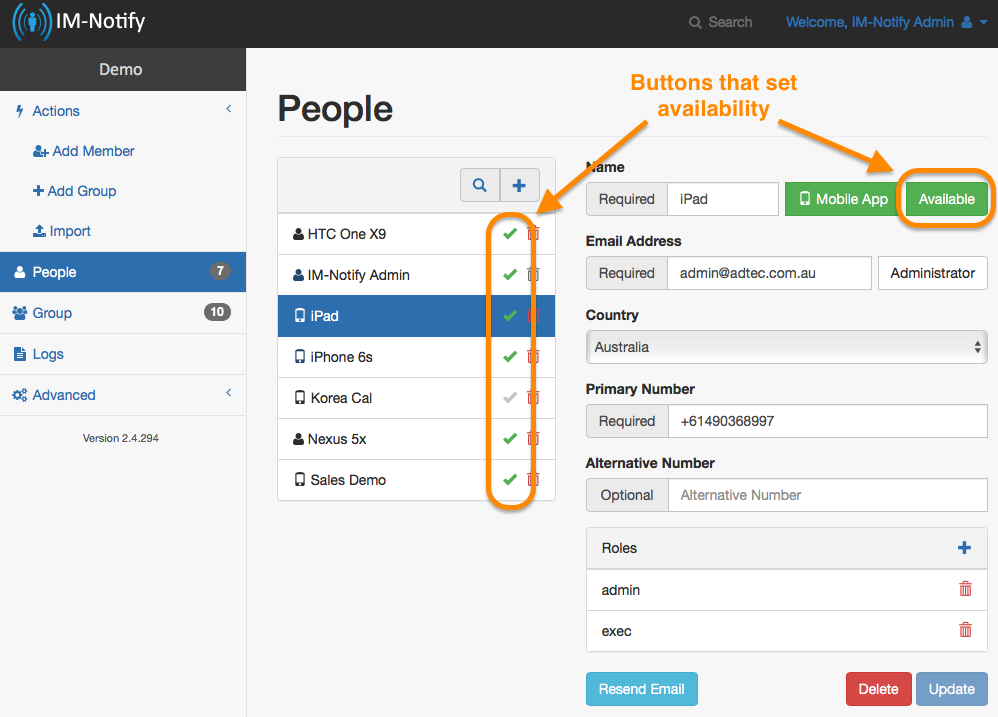
Buttons used to modify availability for people
To modify a persons availability you can simply click on the tick next to their name in the people list OR select them in the people list, then click the Available button in the persons detail area, and press update to save this change.
Administrator access
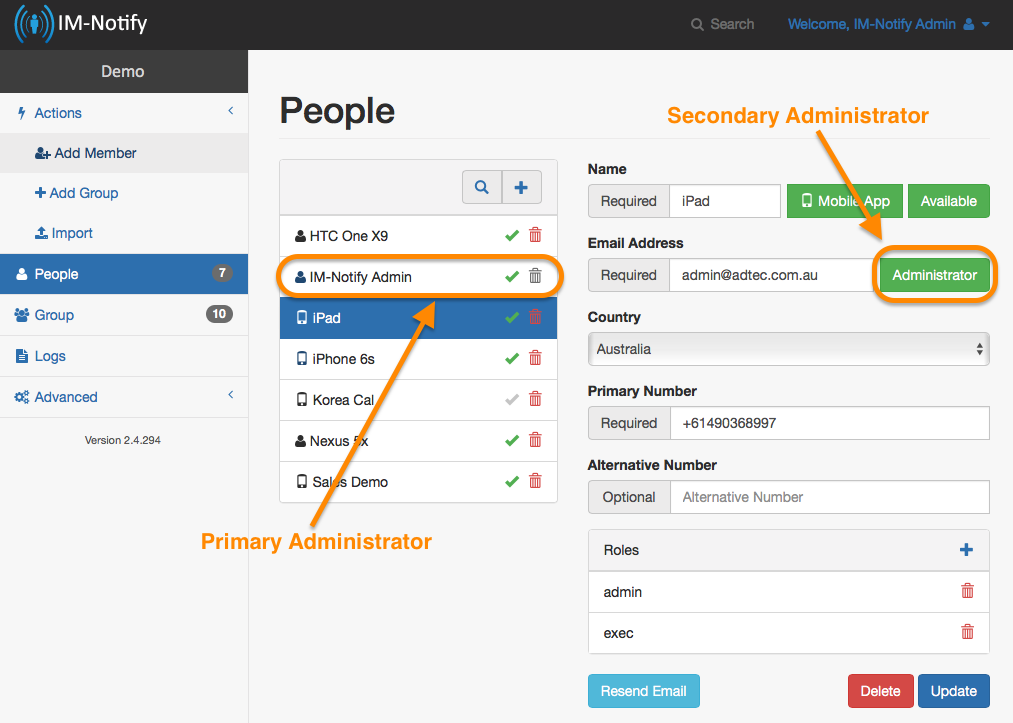
Administrators
Primary administrator
The primary administrator refers to the account owner (the person who originally began their organisation’s IM-Notify). This is a special user who cannot be removed using the IM-Notify portal by any user. This user is identified by the ‘bin’ icon in the people list being disabled/grey, and when selected the administrator button will not be present on the settings panel.
Secondary administrator
Secondary administrators is any person in your account who has been designated access by the primary administer. Secondary administrators have the same access rights as the primary administrator, however their administrator privileges can be removed.
Creating Administrators
The primary administrator can create secondary administrators. This is done by selecting the Administrator button (which will turn green) and then updating the persons settings. Upon updating, this person will receive an email with a one time link which is valid for 24hrs. The email recipient is required to click on this link, and once the IM-Notify portal is loaded they will be prompted to enter a password for themselves. Once the password is set this user will then be able to login using the main login screen by entering their email address as their username and the password they created as the password.
Removing Administrators
To remove the secondary administrator’s access, simply click on the administrator button in the person’s setting (the button will turn grey), and then click on update.
For more information on administrators, click here.
Resending the one time link
If you need to resend the one time link to a user follow these steps:
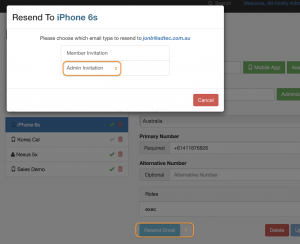
Resend emails menu
Steps
 Click on the ‘Resend email’ button in the bottom of the person’s settings panel.
 Select the ‘Admin Invitation’ option. The email will be sent immediately and a confirmation will be displayed.
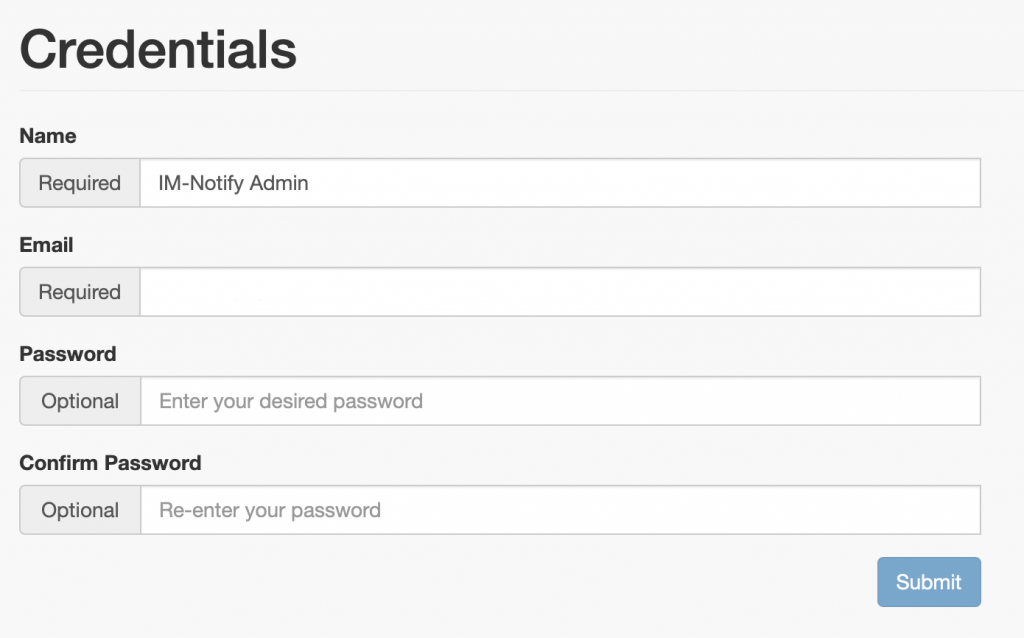
Modify passwords
Passwords for portal access may only be modified by the user that is logged in. Other administrators must login to edit theirs.
Steps:
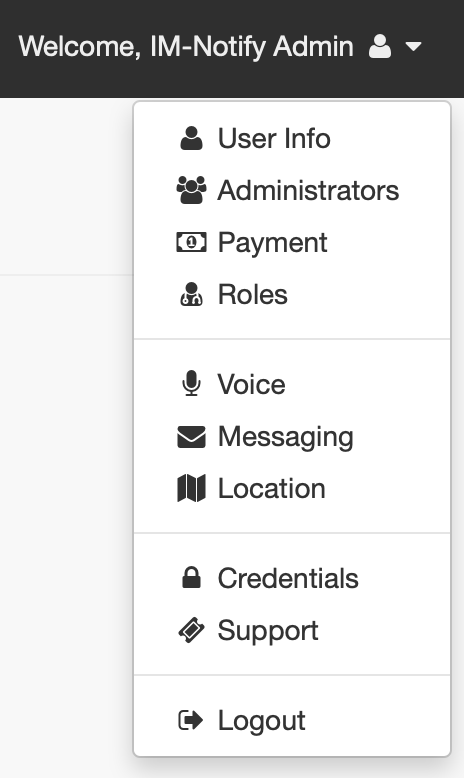
Click on the Welcome text at the top right of the portal to open the user menu.
Select ‘Credentials’
 Fill in the password and confirm password fields and click the submit button.
Modifying roles
Roles can simplify the overall administration process of adding and people to relevant groups. A user can have no roles or multiple roles if they are defined in your account.
Adding roles
Roles may be added to a person using these steps:
Steps:
Click on the ‘+’ button on the ‘Roles’ list header in the user settings.
Select the new roles to assign by single clicking on the role/s required. Selected roles will appear in the ‘Selected’ list. If a lot of roles are present for your account you may first filter them using the search facility. If you have miss-selected simply use the bin icon in the ‘Selected’ panel to remove then.
Once you have completed selecting the new roles click on the ‘OK’ button to add them.
 Now click the ‘Update’ button to save the changes.